
Part 4 : Creating a Simple UI in TFT LCD Display using Library
- Jan 8, 2022
- 3 min read
Updated: Jan 16, 2022
In this tutorial, we will be looking at how to create a simple user interface in TFT LCD Display using SPFD5408 library as shown below.
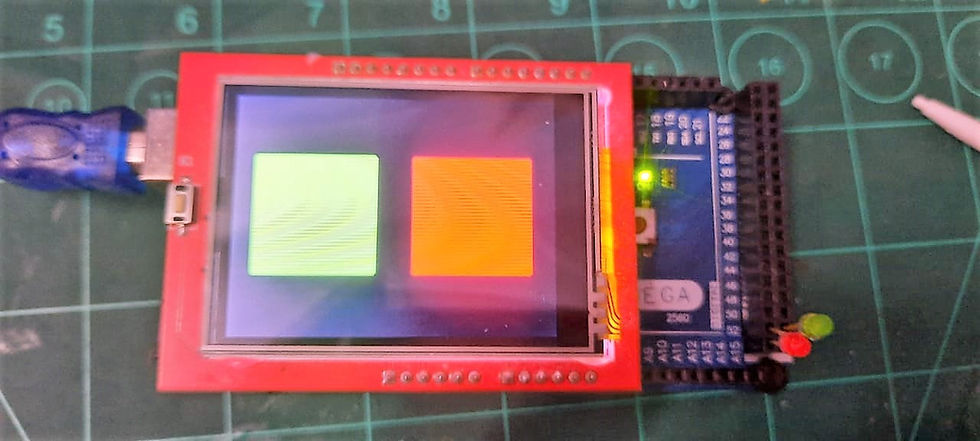
The program will simply light up Green LED when the green box is pressed and light up Red LED when the red box is pressed.
The program is as shown below :
#include <SPFD5408_Adafruit_GFX.h>
#include <SPFD5408_Adafruit_TFTLCD.h>
#include <SPFD5408_TouchScreen.h>

#define LCD_CS A3
#define LCD_CD A2
#define LCD_WR A1
#define LCD_RD A0
#define LCD_RESET A4

#define BLACK   0x0000
#define BLUE    0x001F
#define RED     0xF800
#define GREEN   0x07E0
#define CYAN    0x07FF
#define MAGENTA 0xF81F
#define YELLOW  0xFFE0
#define WHITE   0xFFFF

//These are the pins for the shield!
#define YP A1
#define XM A2
#define YM 7
#define XP 6

// Calibrates value
#define SENSITIVITY 300
#define MINPRESSURE 10
#define MAXPRESSURE 2000

Adafruit_TFTLCD tft(LCD_CS, LCD_CD, LCD_WR, LCD_RD, LCD_RESET);
TouchScreen ts = TouchScreen(XP, YP, XM, YM, SENSITIVITY);

void setup(void) {
  Serial.begin(9600);
  pinMode(53, OUTPUT);
  pinMode(52, OUTPUT);

  uint16_t identifier = tft.readID();
  Serial.print("Controller ID : ");
  Serial.println(identifier, HEX);

  tft.reset();
  tft.begin(0x9341);
  tft.setRotation(3);
  tft.fillScreen(BLACK);

  //tft.fillRoundRect(x, y, width, height, curvature, color);
  tft.fillRoundRect(20, 60, 120, 120, 3, GREEN);

  //tft.fillRoundRect(x, y, width, height, curvature, color);
  tft.fillRoundRect(175, 60, 120, 120, 3, RED);
}

void loop() {
  digitalWrite(53,LOW);
  digitalWrite(52,LOW);
  TSPoint pinitial;
  pinMode(XM, OUTPUT); //Pin Config for TouchScreen
  pinMode(YP, INPUT);
  pinitial = ts.getPoint();

  pinMode(XM, OUTPUT); //Pin Config for Display Screen
  pinMode(YP, OUTPUT);
  while (pinitial.z > MINPRESSURE && pinitial.z < MAXPRESSURE) {
    if ((pinitial.x > 380 && pinitial.x < 760) && (pinitial.y > 520 && pinitial.y < 790)) {
      digitalWrite(53,HIGH);
      delay(300);
    }
    if ((pinitial.x > 380 && pinitial.x < 760) && (pinitial.y > 160 && pinitial.y < 430)) {
      digitalWrite(52,HIGH);
      delay(300);
    }
    break;
  }
}
One important part of the code to look at is the sensitivity of the touch screen.
// Calibrates value
#define SENSITIVITY 300
#define MINPRESSURE 10
#define MAXPRESSURE 2000

Adafruit_TFTLCD tft(LCD_CS, LCD_CD, LCD_WR, LCD_RD, LCD_RESET);
TouchScreen ts = TouchScreen(XP, YP, XM, YM, SENSITIVITY);
Different LCD may have different MINPRESSURE, MAXPRESSURE and SENSITIVITY, hence try varying the value according to your desire after some trials. Note that a very low MAXPRESSURE would render the program non-functional towards a strong or a sudden touch.
Within the void, we have one green and red box created in which we will be using to detect touch within these boxes.
  //tft.fillRoundRect(x, y, width, height, curvature, color);
  tft.fillRoundRect(20, 60, 120, 120, 3, GREEN);

  //tft.fillRoundRect(x, y, width, height, curvature, color);
  tft.fillRoundRect(175, 60, 120, 120, 3, RED);
The below part of the code is used to detect touch within the green and red box that we have created in the void setup.
  while (pinitial.z > MINPRESSURE && pinitial.z < MAXPRESSURE) {
    if ((pinitial.x > 380 && pinitial.x < 760) && (pinitial.y > 520 && pinitial.y < 790)) {
      digitalWrite(53,HIGH);
      delay(300);
    }
    if ((pinitial.x > 380 && pinitial.x < 760) && (pinitial.y > 160 && pinitial.y < 430)) {
      digitalWrite(52,HIGH);
      delay(300);
    }
    break;
  }
pinitial.x and pinitial.y values which are used here simply refers the boundaries of the red and green boxes. Understanding the values that are produced when these areas touched would help in setting accurate values in your if function.
With that, we have come to the end of the video. I hope this simple User Interface would inspire or give you an idea to create an User Interface that you need for your project.
Thank you for watching. Please don't forget to Like and Subscribe.
For more detailed instructions, check out my YouTube video below :

Comments