NRF24L01 Sending and Receiving Transmitter Integer
- electronicseternit
- Dec 30, 2020
- 1 min read
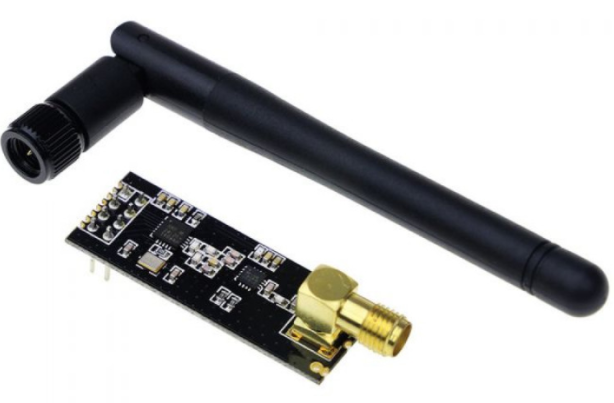
In this tutorial, we will be learning how transmit integers using NRF24L01 module.

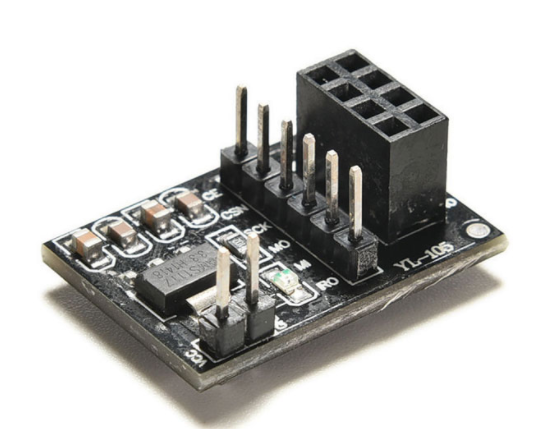
For this setup, I will be using NRF24L01 with its 5V adapter. This adapter makes the voltage control easy for us.

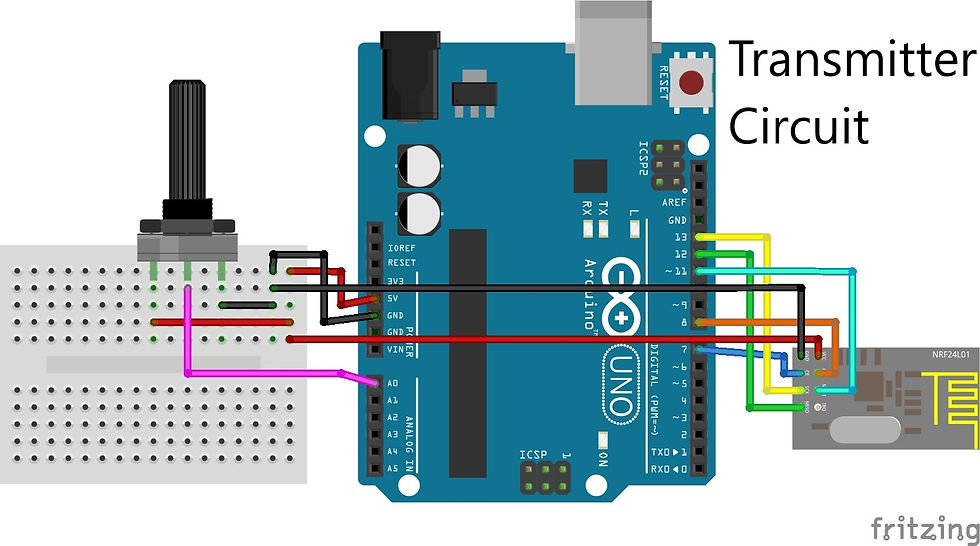
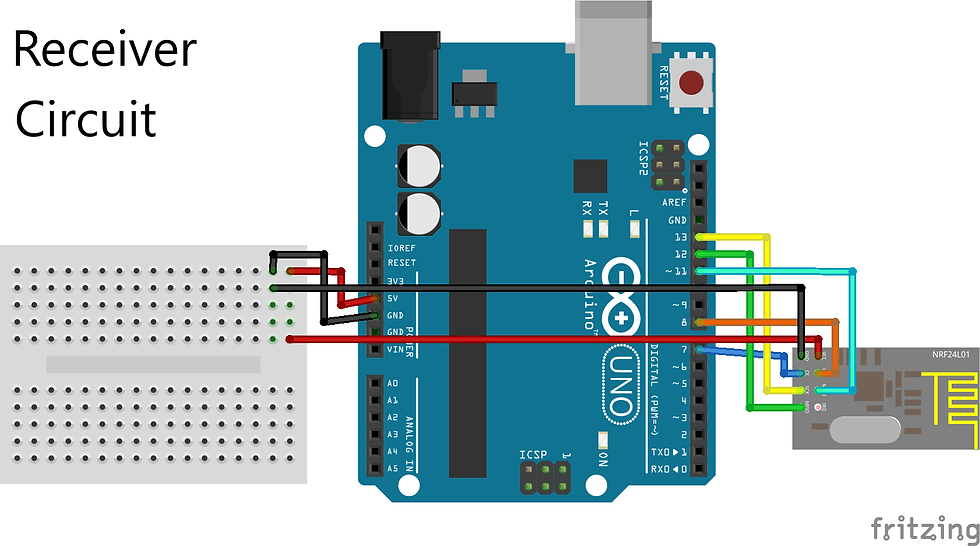
PINs between Arduino UNO and NRF24L01 can be connected as shown in the table below.

Below shows the schematic connection for the Transmitting and Receiving end.


Once the circuit has been connected as shown above, we can then upload the below code :
Transmitter Code
// NRF24L01 UNO
// CE 7
// CSN 8
// SCK 13
// MOSI 11
// MISO 12
#include <SPI.h>
#include <nRF24L01.h>
#include <RF24.h>
RF24 radio(7, 8); // CE, CSN
const byte address[6] = "00001";
int pot = A0;
void setup() {
pinMode(A0, INPUT);
Serial.begin(9600);
radio.begin();
radio.openWritingPipe(address);
radio.setPALevel(RF24_PA_MAX);
radio.stopListening();
}
void loop() {
int value;
value = analogRead(A0);
Serial.println("Sending message");
radio.write(&value, sizeof(value));
Serial.println(value);
//delay(1000);
}
Receiver Code
// NRF24L01 UNO
// CE 7
// CSN 8
// SCK 13
// MOSI 11
// MISO 12
#include <SPI.h>
#include <nRF24L01.h>
#include <RF24.h>
RF24 radio(7, 8); // CE, CSN
const byte address[6] = "00001";
void setup() {
Serial.begin(9600);
radio.begin();
radio.openReadingPipe(0,address);
radio.setPALevel(RF24_PA_MAX);
radio.startListening();
}
void loop() {
if (radio.available()) {
int value = "";
radio.read(&value, sizeof(value));
Serial.println(value);
}
}
For step by step video on this, feel free to checkout my Youtube video below :
If you have any comments or question, feel free to post it :) Good Luck Trying!

Comments