
Arduino Bootloader ATMEGA328P
- Jun 5, 2021
- 2 min read
In this tutorial, we will be looking into how to perform bootloading into a raw ATMEGA328P chip. What is meant by raw ATMEGA328P here is a chip that is not ready to be used in any Arduino board, without a bootloader in it.
Bootloading is important to ensure that ATMEGA328P can understand the command or programs that is uploaded from Arduino IDE. Basically, bootloader is a combination of hex codes. In my assumption, this hex codes simplifies our programming language as what is used in Arduino IDE, which is more human-readable.
To perform bootloading, construct the circuit as shown below. The below schematic is gathered from Arduino’s official website.

Once the circuit has been connected, we can move into uploading the codes and performing bootloading from Arduino IDE.
First, we must upload the ArduinoISP program from the Arduino examples into the Arduino board which make the Arduino board to function as the programmer in this scenario.

We also need to make sure that the Programmer Option under Tool tab is being to set to “AVRISP mkII” as shown below.

Once done, click Upload.
Now, your Arduino board is ready to bootload the raw ATMEGA328P.
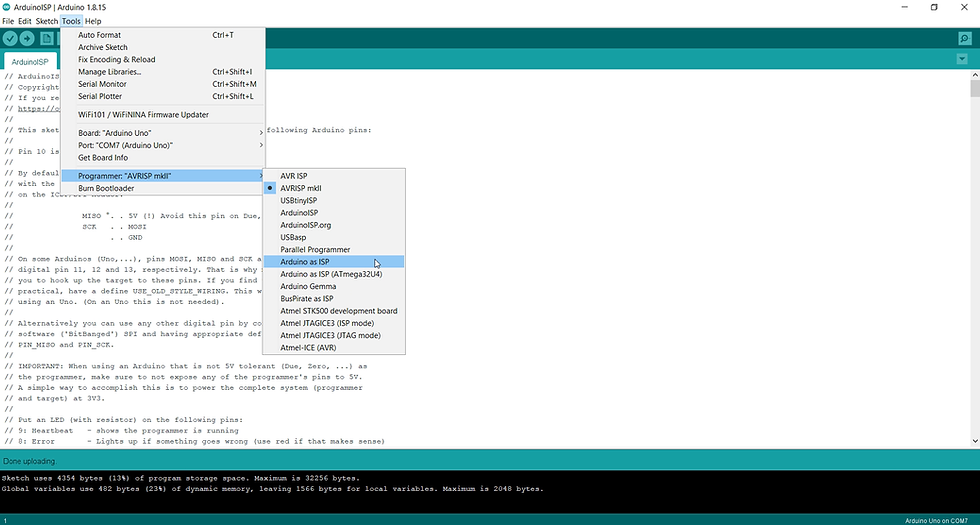
At this point, you need to change the Programmer Option under Tool tab to “Arduino as ISP” as shown below. Be careful NOT to choose ArduinoISP.
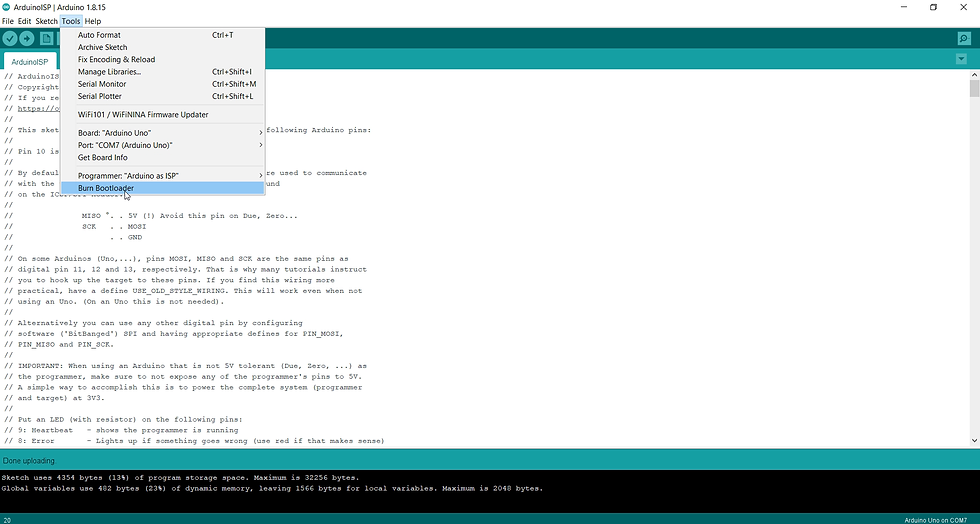
Once this is done, you can click the BurnBootloader as shown below.
At the point of successful bootloader burning, you will get a message saying “Done Burning Bootloader”. You have now completed your bootloading process.
You can now upload any Arduino Programs into this new bootloaded ATMEGA chip. Try testing with simple codes like “Blink” program to see if it’s working.
For more detailed explanation on ATMEGA bootloading, check out my YouTube video below :
Good Luck Trying. Feel free to comment or post your questions.

Comments